Joining a Zoom online meeting in myLearn
Using Zoom at UNE
Zoom is a communication tool that offers a range of options including online discussions, chat rooms, breakout rooms and interactive whiteboards. UNE uses Zoom
web conferencing software to conduct online tutorials and discussions. Sessions can utilise audio and video by the presenter and the participants.
Zoom can be used to:
- Watch live video of the presenter and/or participants.
- Listen to the presenter and/or participants.
- Watch slideshows or demonstrations on the presenters computer.
Zoom can be used on PCs Macs as well as Android and iOS devices. See Zooms System Requirements For PC, Mac, And Linux for information about system requirements and supported operating systems and mobile devices.
Benefits of attending Zoom sessions
1. Setup
Before joining a meeting with a new device install Zoom and test your microphone by visiting http://zoom.us/test
2. Headphones and microphones
To be able to speak, you will need a microphone and to use video you will need either a built-in or external camera. It is strongly recommended that you use a headset with a built-in microphone or at least headphones as noises from your surrounding area and feedback from speakers can be distracting for all participants (a USB style headset has proven to provide superior audio quality to the jack style headset).
This video explains how to set up your audio and video
Zoom sessions are usually are usually provided through the myLearn site for your unit. If a session has been set up for your unit a link will be visible with the Zoom icon. Click the link to find out details about the meeting.
![]()
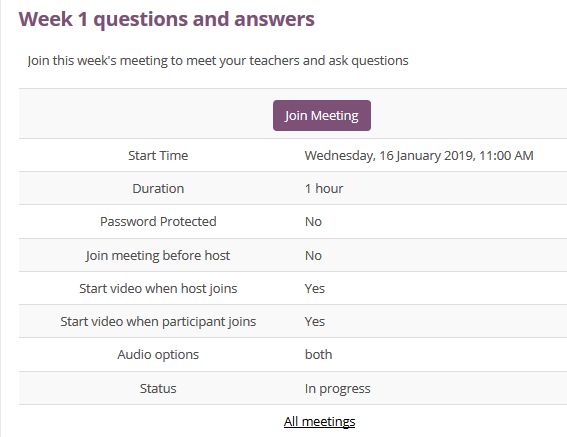
Meeting details
The meeting page displays meeting times and other information about the meeting. Press the Join Meeting button to join the meeting.
Note: If the computer you are using does not have the Zoom App installed, you will be prompted to install it. You only need to do this once.
Join
Depending on the browser, a pop window may appear asking you to Open Zoom Meetings, press Open Zoom Meetings to proceed.
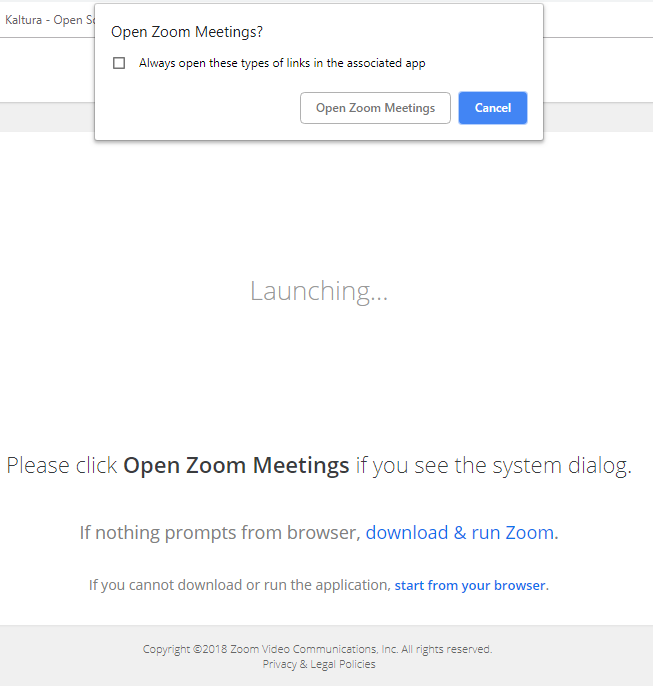
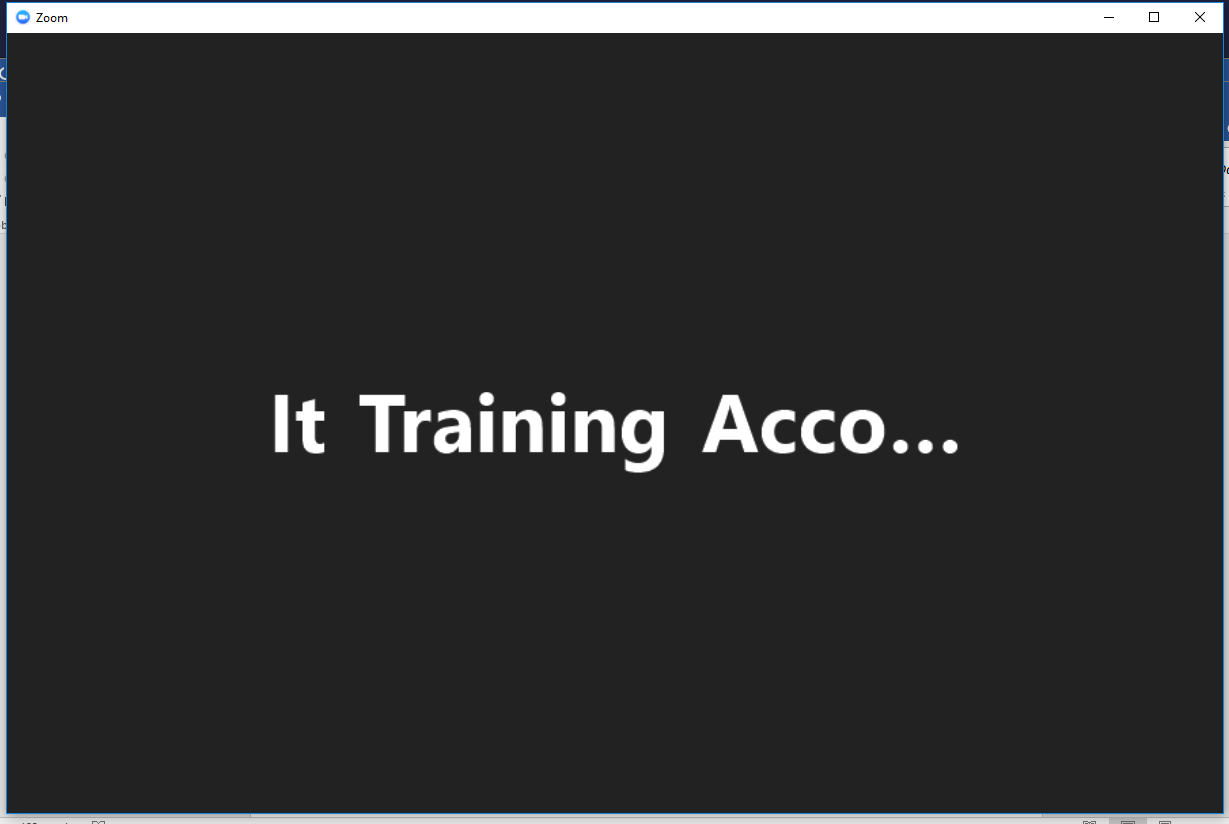
A separate screen will now appear showing your Zoom meeting.
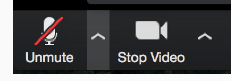
Available options appear across the bottom of your screen.
![]()
Within the online classroom, you will be able to:
Mute/ unmute your microphone and show/ stop video :
- use the controls on the bottom left of the screen.
- Microphones can detect many noises from your surroundings and these noises may be heard by all participants.
- Mute your microphone by clicking on the icon in the bottom left of the pop-up ribbon in Zoom when others are speaking.
- The arrows next to these controls allow you to change the settings for the microphone/ webcam.
View participants:
- Click on the participants button at the bottom of the screen.
- The participants list also gives you the option to raise your hand – this notifies the unit coordinator that you have a question or comment.

Participate in chat :
- Click the chat button to open up the chat window.

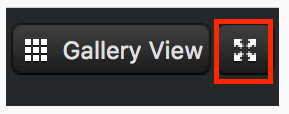
Switch to full screen:
- This control is also in the top right corner.
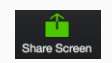
Share your screen:
- You may also be asked to share your screen or co-annotate on a whiteboard.
- Your unit coordinator will let you know if this will be required.
- To share your screen use the control on the bottom of the screen.
Annotate:
- Click on the View options at the top of the screen and choose Annotate.
- Use the controls at the bottom of the screen to insert text, draw etc.
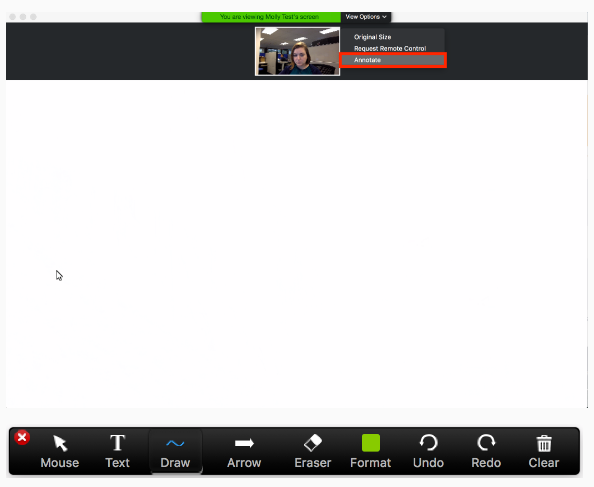
Note: Some Zoom toolbars auto hide when you are screen sharing. To activate them, hover over the top or bottom edge of your screen.
When the session is finished, click on the Leave Meeting link in the bottom right of your screen.
![]()
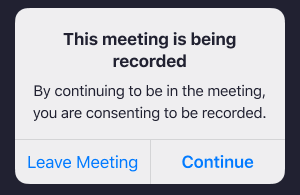
Meetings are often recorded for participants to review and those unable to attend. Expect a delay while the recordings are processed and made available. Recordings may be provided with other lecture recordings or within Moodle. Check the unit content for more details.
A pop up message will let you know that a meeting is being recorded before the recording starts.
For information on how to record your own meeting check out the Recording a Zoom Meeting page.